
Summer is quickly approaching and it always gets me in the mood to start new projects! I love themed decor and since one of the biggest holidays of the summer is Fourth of July, I thought I would put together a simple and cute DIY!
If you have been on Pinterest or Instagram lately, you have surely come across the macramé trend! The fun part about the trend is a lot of people have been able to add their own touches to it. Most of the DIYs I do on my page consist of items from Michael’s Craft Store. I’m not even kidding, the people there recognize me at this point because I go there about 3 times a week! Anyways, I mostly go there because they always have coupons and flowers usually have a 40-50% discount. Now that you know there are coupons to save you $$$ here are the items you will need for this DIY!
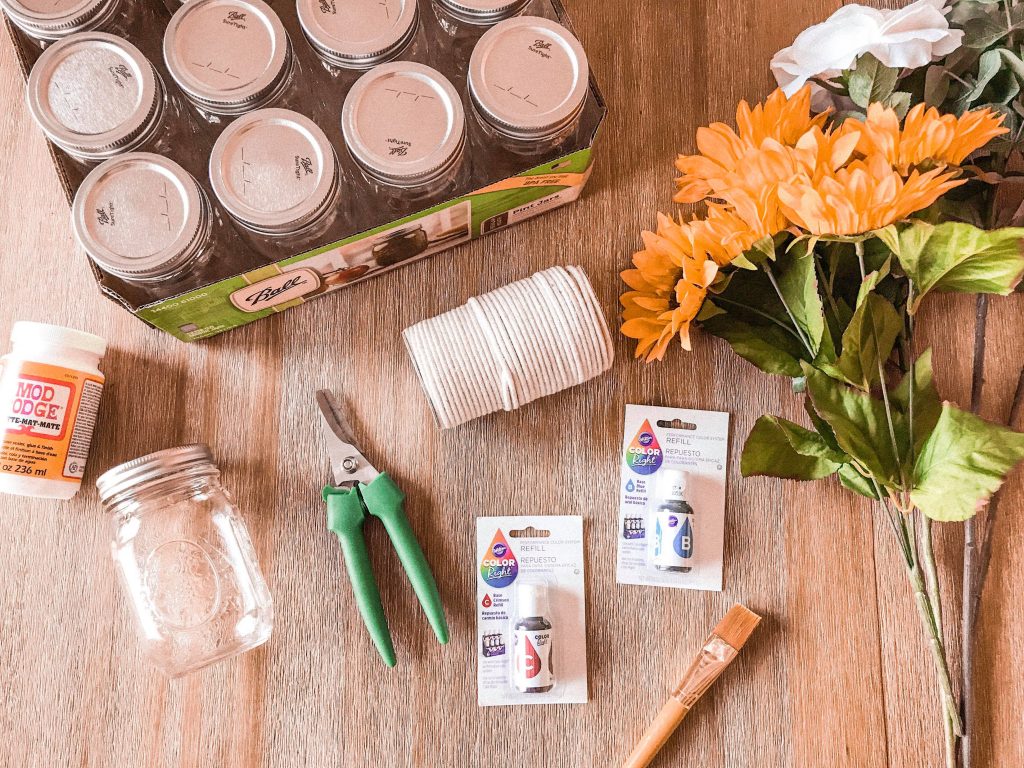
For the planter you will need:
- macramé cord
- rings
- floral cutters or wire cutters (wire cutters work best, but I only had floral cutters which got the job done)
- faux sunflowers
- faux peonies
- faux daisies
- scissors
Note: Rings are optional (see step 2).
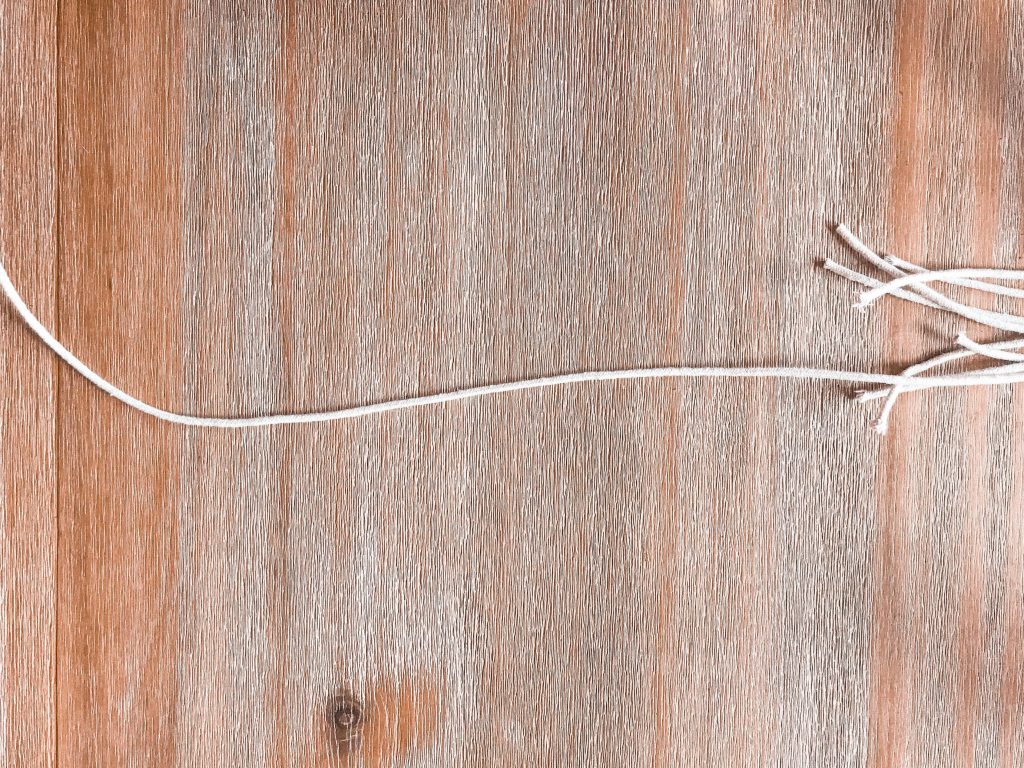
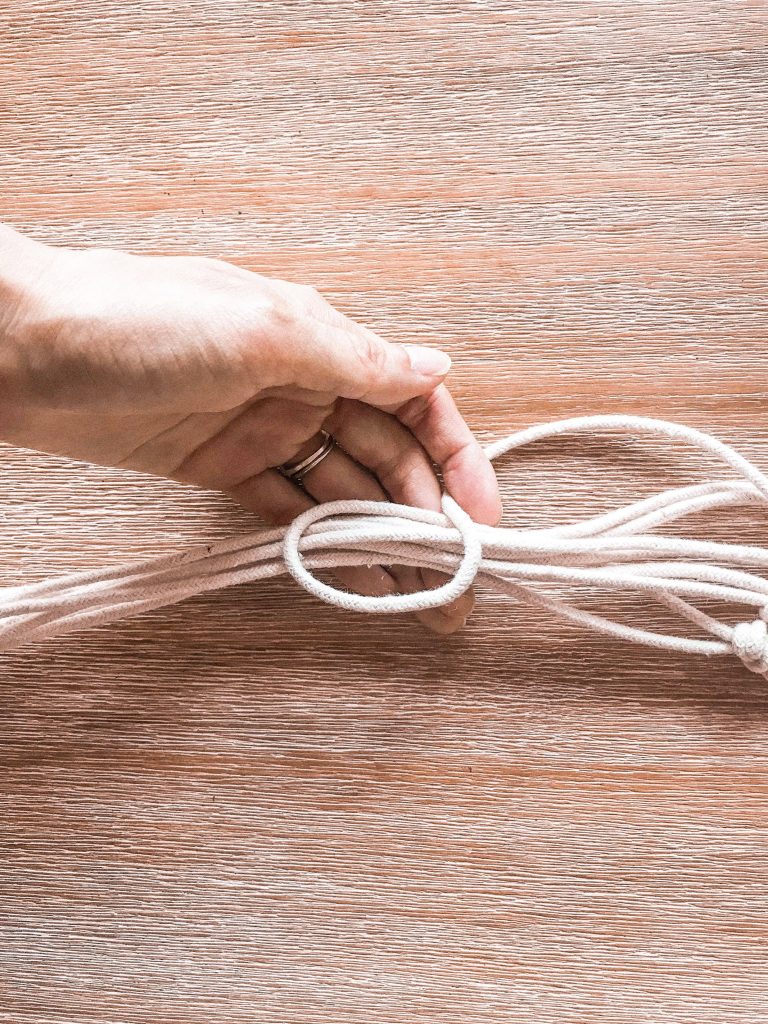
Step 1: Measure out 4 strands of cord. I measured 3 of the strands to be around 58 inches. One strand needs to be 75 inches.
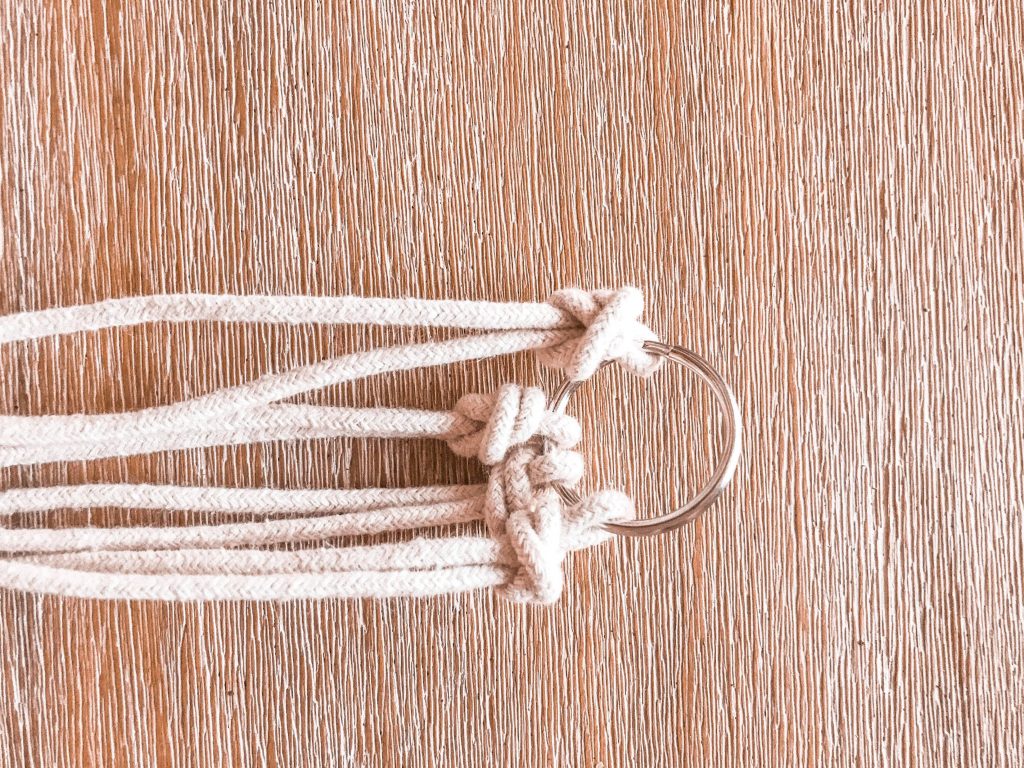
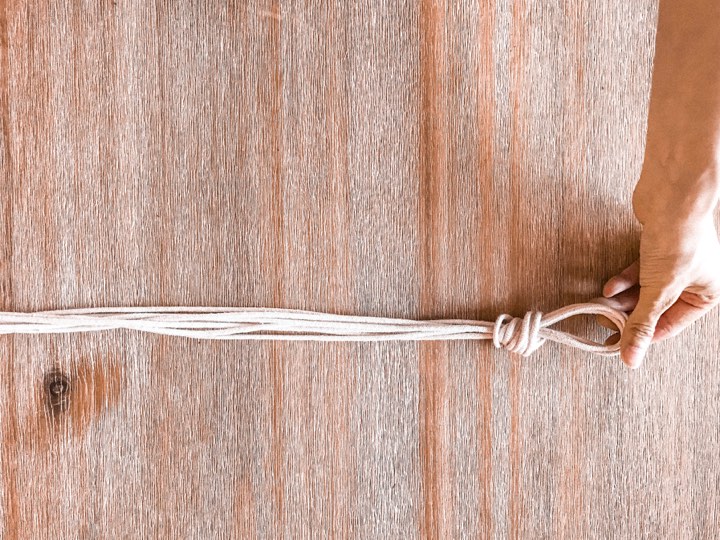
 Step 2: You can either use a ring and take each strand. Tie a knot in the middle of the strand around the string. Another option if you want to skip out on the ring or if you like the look better is to gather the middle of the strings and tie a knot at the top to make a loop.
TIP: Make sure one strand has a little extra length at the end. See third picture below.
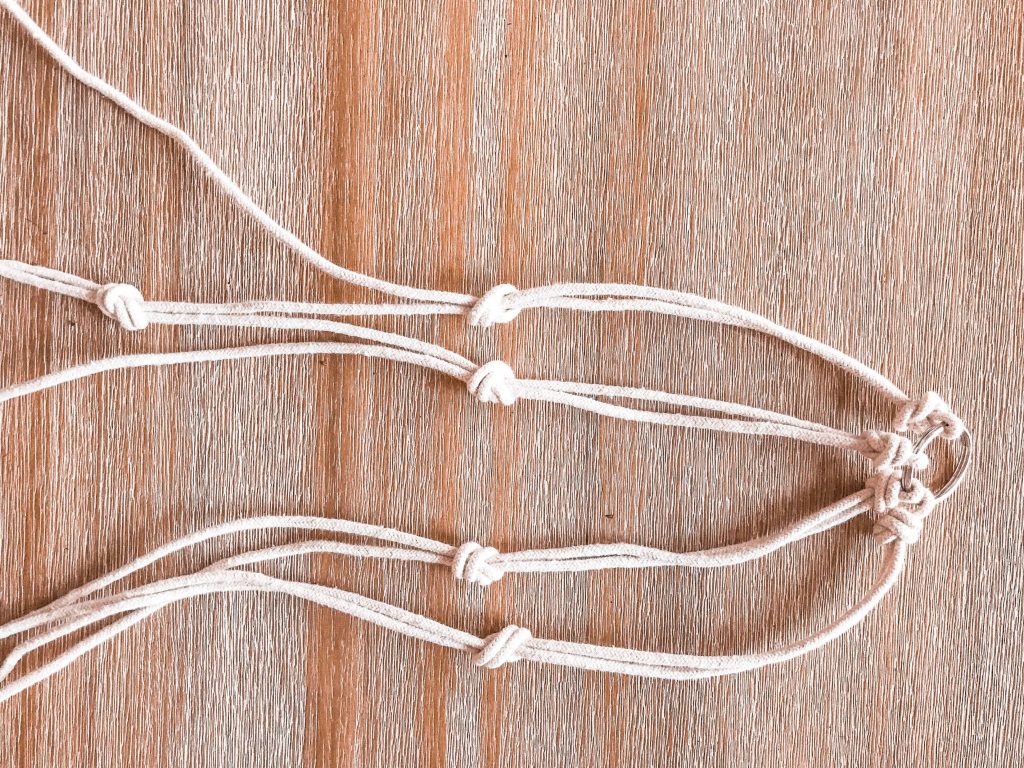
Step 3: Take the pairs and make a knot on each one.
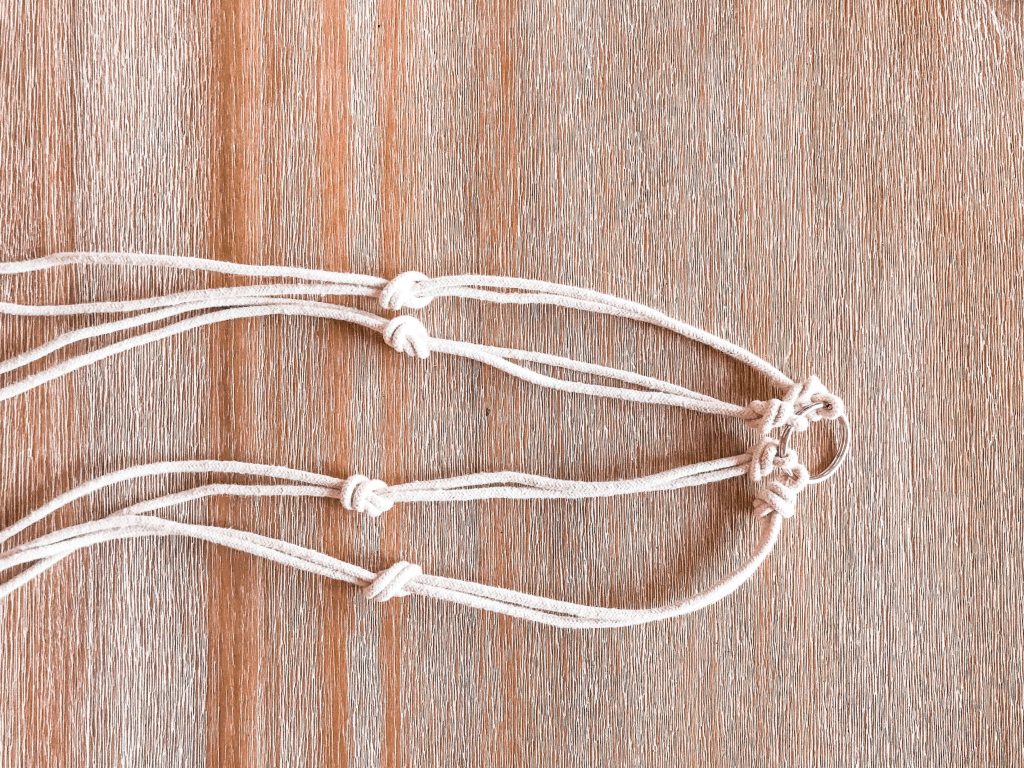
Step 4: Take the strands that are next to each other(they should be from different strands) and make a knot. Continue doing this until each has a pair.
Step 5: Make a loop with the longest strand and then start wrapping the strand around all of the cords. Then once there’s just a little loop left, pull the bottom of the string through to create a different type of knot.

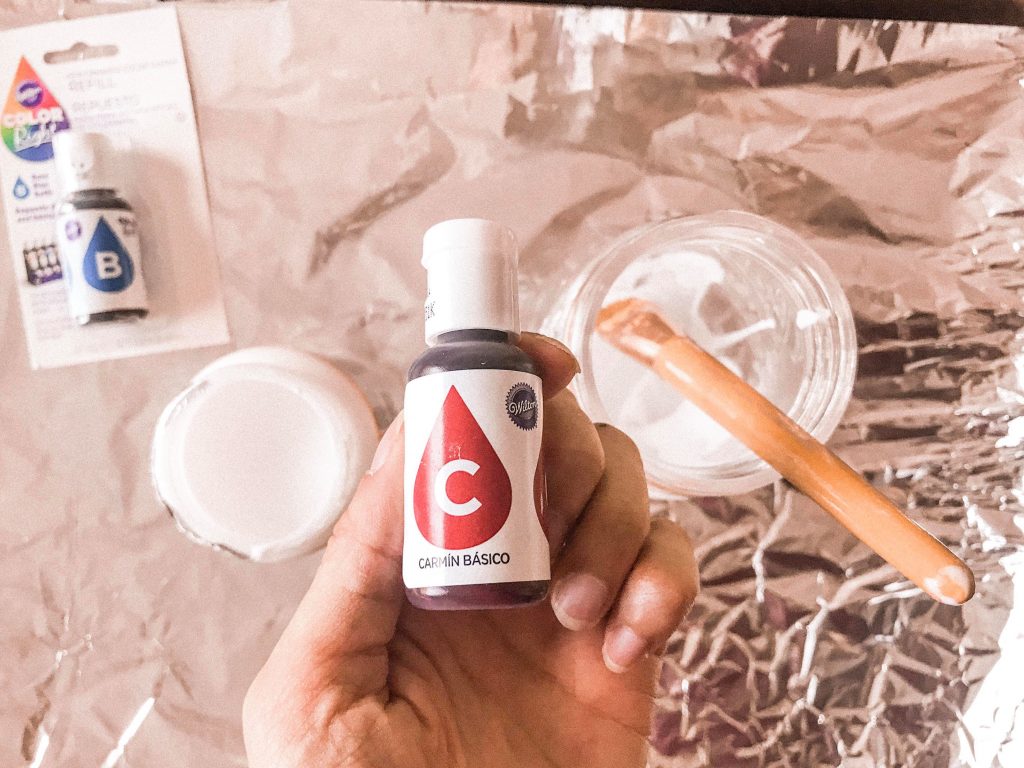
Now to dye the Ball Canning jars. This step is optional. As you can see from my photo, I ended up dying two of the jars and leaving two of them as they were.
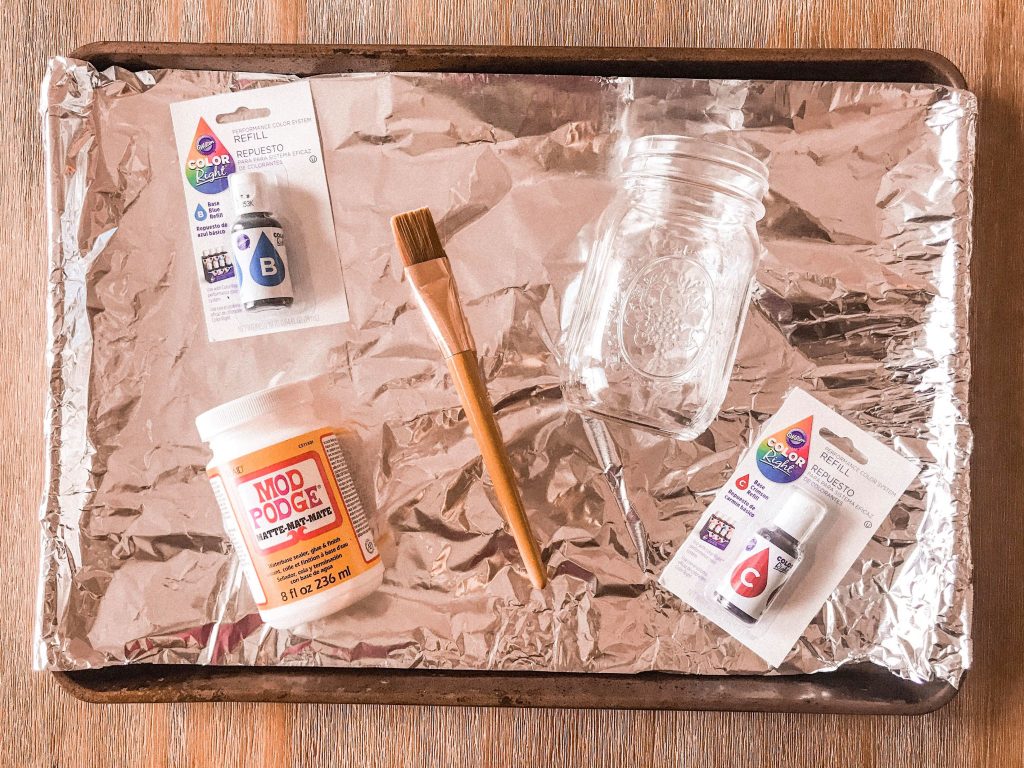
For the dyed jars you will need:
- Wilton Color Right Base Refill
- a paintbrush
- a bottle of Modge Podge
- a box of pint Ball Canning jars
- water
Step 1: Take the color you would like your jar to be and put a few of the drops into the jar. Blue took about 1-3 drops to get my desired color and red took 6-8 drops to get the light red color I wanted. Add 3 tablespoons of modge podge and 4 tablespoons of water. Mix it together with the paintbrush.
Note: I actually ended up only using blue in the end because I liked the color the best!
Step 2: Cover the inside of the jars with the mixture using your paintbrush. Try to keep it as even as possible so it isn’t super streaky. Let the jars sit upside down on a tray for at least 30 minutes. Then wipe the mouth of the jar so there isn’t a lot of uneven paint. Then flip the jars right side up on the tray.
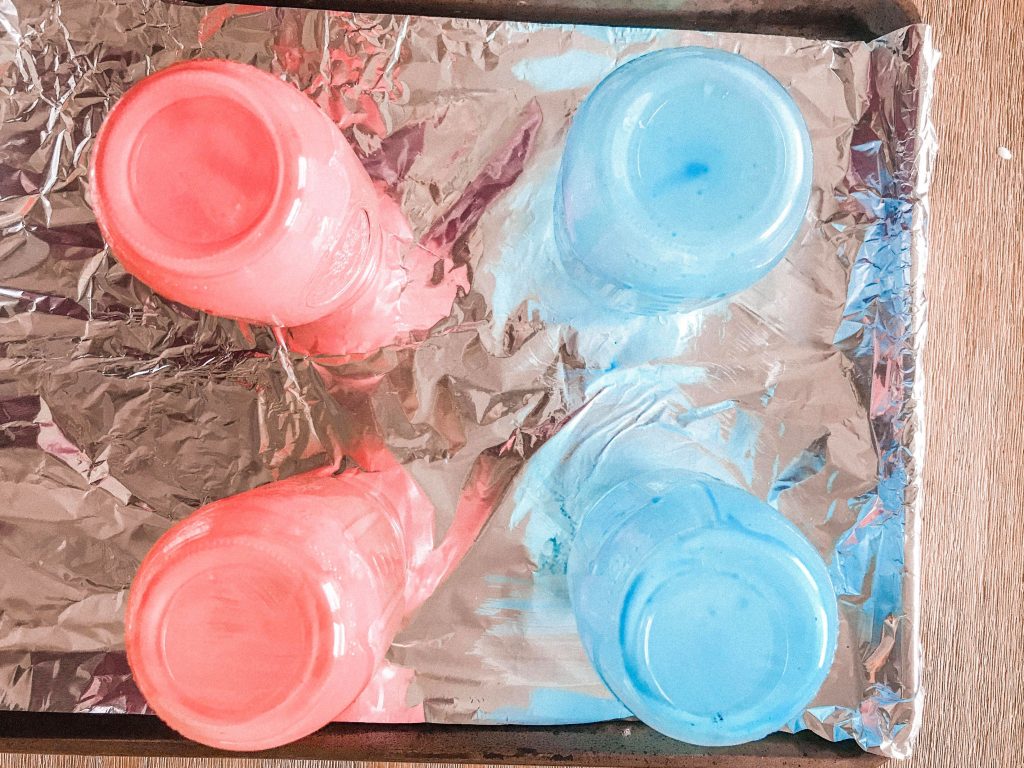
Step 3: Turn the oven to 215 degrees and once ready, put the jars in for about 30 minutes and then take them out.
Lastly, take your jars, place them in your macramé planter, and add flowers! This whole DIY was super easy and honestly didn’t take very long. I made a few mistakes and had to experiment to get the jar color I wanted, but it overall took me about an hour to make 4 complete planters! Also, something else I’ve learned from this whole DIY is that Ball jars are tough! I dropped 2 on the ground, screamed in horror at the thought of having to sweep them up, and they literally just bounced and didn’t even crack! Basically, if you’re looking for a durable and cute craft, feel free to try this one out!
For more craft and home ideas feel free to check out @michaelsstores, @ballcanning, #makeitwithmichaels, and #craftwithball on Instagram!
[Disclosure: This post was sponsored by Ball Canning and reflects my personal opinions.]
