
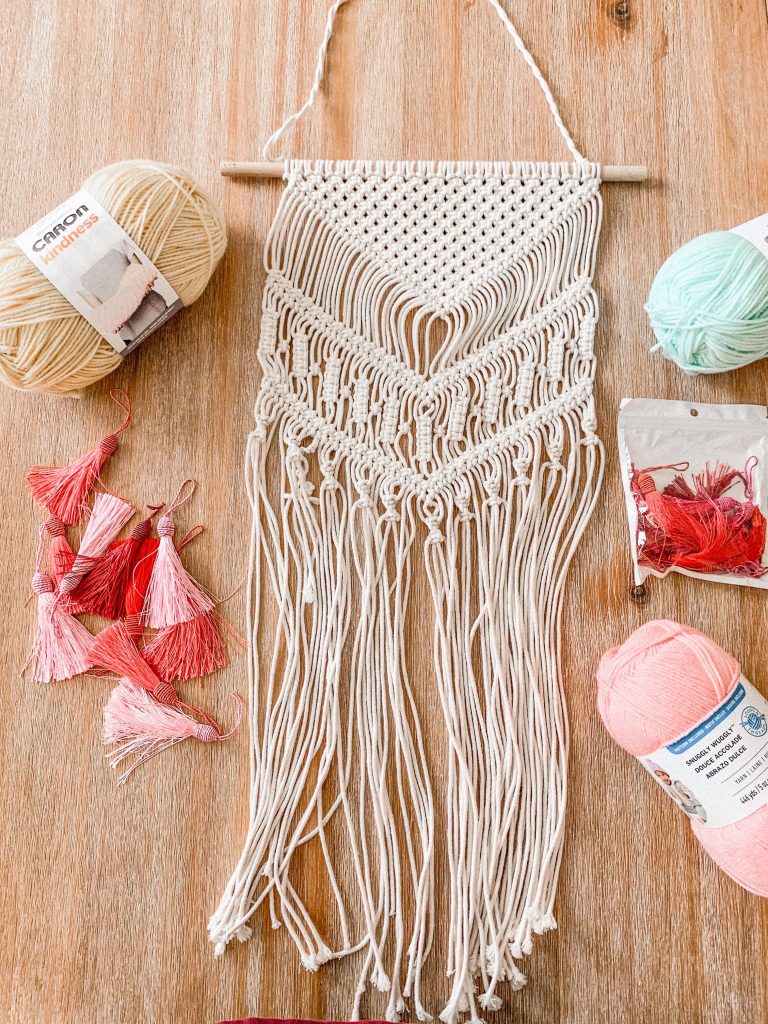
I picked up this macramé hanging when macramé first became BIG! Then they started mass producing the same ones over and over again and slowly it became less exciting in my eyes. This one has been hanging out in my closet for the past 6 months because I just didn’t know where to put it. Finally I saw these tassels and just knew they were meant for making this macramé new again! For this project, you’ll need colored tassels of your choice, a basic macramé hanging, scissors, and a hot glue gun. You could also pick up colored yarn, but that is optional!
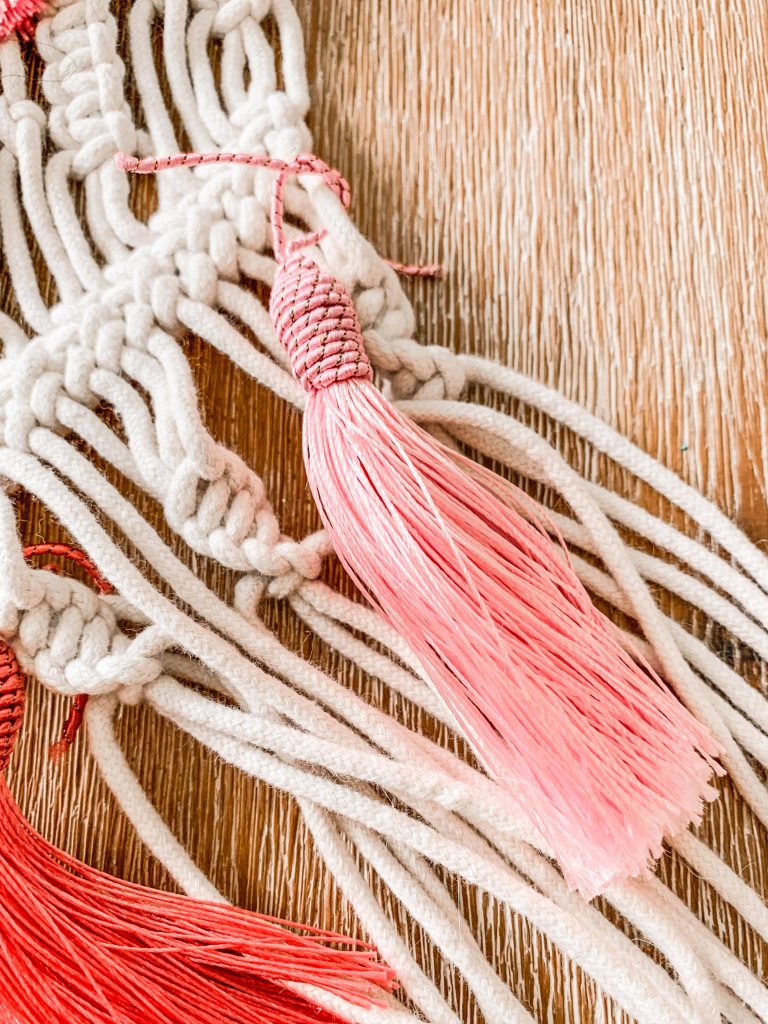
I chose to do a pattern of 6 tassels at the top and 6 tassels in the middle. I cut the tassel loop in half and then tied it on to the different spots I picked out.
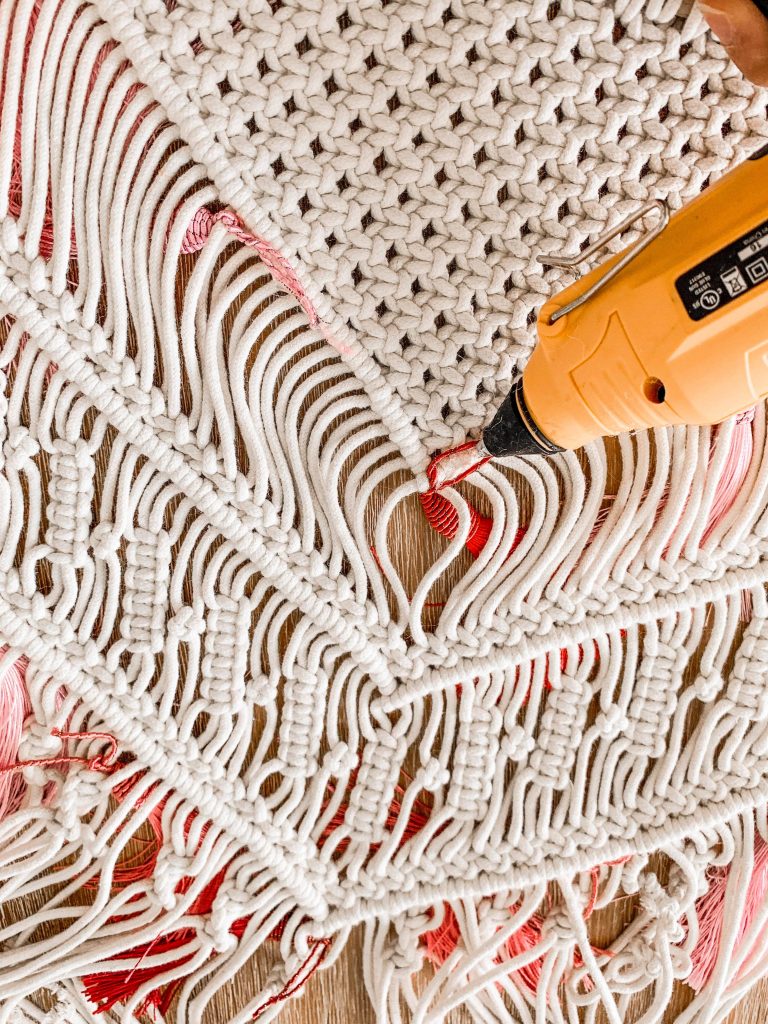
After I finished tying all of my tassels, I turned the macramé over and hot glued all of the strings in place so you couldn’t see them from the front.
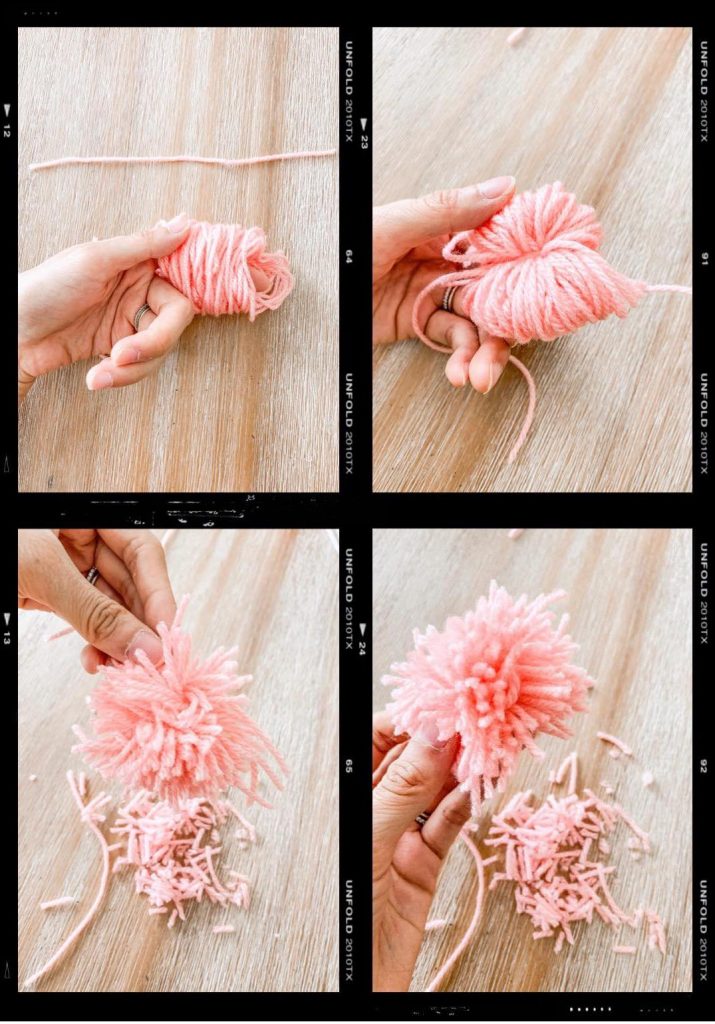
This part is completely optional, but if you’d like to add some pom poms to your design,
1. Cut a small piece of yarn and put it aside.
2. Wrap the yarn around your fingers about 30 times.
3. Take the small piece of yarn you put aside and tie the middle of the yarn as tightly as possible.
4. Take some scissors and cut the loops. You may have to even the pom out a little because the strings won’t be even at first.
The pom poms can be used to hang on the top string of the macramé.
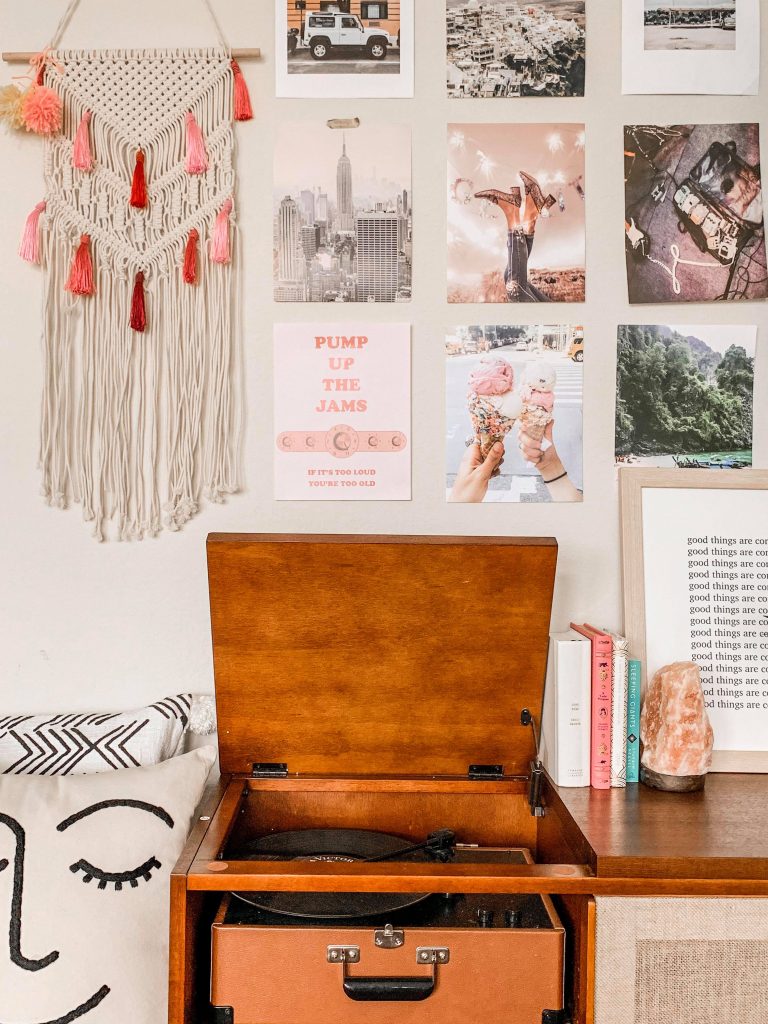
The end result is a super cute and unique-looking macramé wall hanging! I used mine in a gallery wall, but there are so many different ways you could decorate with it!